Freight is an easy way to set shipping presets for use in SalesWarp.
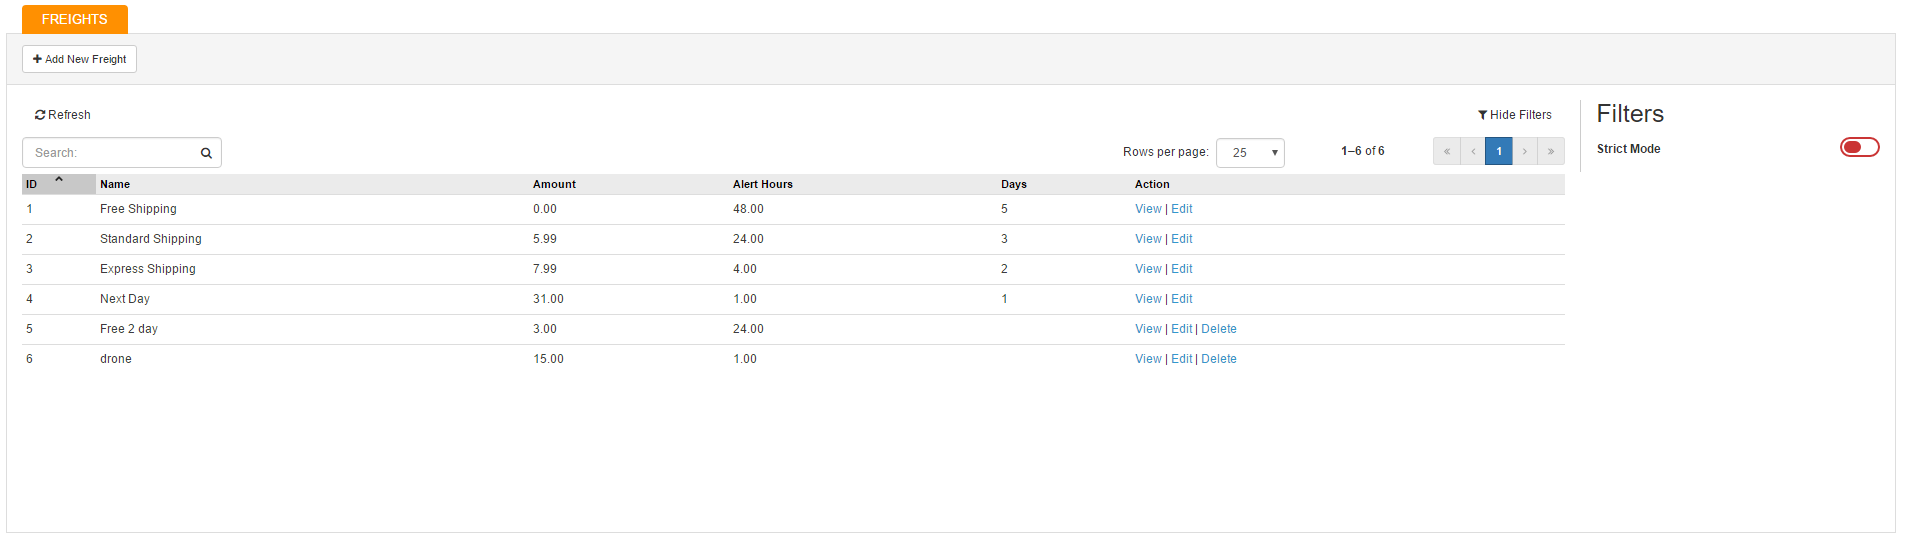
This gives you the ability to specify the days to ship, shipping charges, and amount of time till the order is marked as alert status.
|
Days from shipping to delivery: |
The expected number of days this shipping option will take to get to the customer, once shipped. |
|
Shipping Charge: |
The charge that the customer will incur by using this shipping method. |
|
Hours until order is marked as alert: |
The number of hours after creation that an order with this shipping option can go without being marked as completed or canceled, before being marked with an alert status.
Orders with an alert status can be viewed under the alerts tab on the orders page. |
You can add a new freight preset by clicking the "add new freight" button in the upper right hand corner or you can edit a shipping preset by clicking edit in the preset row.
SalesWarp has built-in ability to print shipping labels for the following carriers. Further, SalesWarp has a built in "Rate Shopping" functionality that can determine which carrier provides the least expensive shipping method based on weight and destination. The built in methods will only apply to domestic shipments.
•FedEx
•UPS
•Endicia (USPS)
Additionally, SalesWarp can integrate with Shipstation and Shipworks applications by generating and accepting files with shipping and tracking information for domestic and international shipping. Shipstation and Shipworks are setup when you initialize your wholesale (internal) warehouse.
To begin, access the Order/Shipping section, choose Order Management, then Shipping API. Click Add Configuration, and give your Shipping API Configuration a name.
.png)
.png)
There's great flexibility in setting up the SalesWarp Shipping API. You can add your Fedex, UPS and USPS (Endicia) account information to SaleWarp and let SalesWarp look for the cheapest shipping rate among all your shippers that meet the storefront shipping criteria.
When you set up the API there are three settings:
•Always let me decide (recommended) - will always show you all available shippers/methods and allow you to choose which shippers label to print
•Auto Select Cheapest - this will look at the available ship methods in Saleswarp and the number of days to ship to select the cheapest method that will meet the buyers expectation when they selected a shipping method at the storefront checkout.
•Give me the option to select
NOTE: Address validation and standardization can be processed through UPS or Endicia (USPS). Address standardization converts addresses to the format used for sorting by USPS and cuts down on undeliverable mail and mailing to invalid addressing. SalesWarp recommends Endicia. Initially, while testing, leave address validation off. When you do go live, remember to come back and turn it on!
Continue setting up specifics for each shipping carrier you will utilize. Your carrier account/integration information can be obtained via your online account at each carrier's website, or from your carrier account manager.
NOTE: During setup, you must enable any given method and take out of test mode to validate, but set back to test mode once validated. If you do not, you run the risk of being charged for "shipping" while testing!
The remaining two tabs contain fields to enter your Warehouse location details, and a Warehouse/Shipping related contact if different.
.png)
Enter your primary shipping warehouse/location information. If the primary contact is different you have the option to enter separate shipper contact details.
.png)
.png)
If you have any questions or require further assistance, please feel free to contact us at support@saleswarp.zendesk.com