SalesWarp uses templates to configure custom email notifications, pick tickets, packing slips, purchase orders. Each type of template will have a default template configured when SalesWarp is installed. You have the ability to modify the existing default template or add your own, you can set up unique templates for certain situations or storefronts. You can access and modify all templates from the Orders/Shipping tab.
If you have a need for individual templates for any or all stores, you have to create new templates and assign them per store, for instance if you wanted to brand your Ebay or Amazon pick tickets, so you would know at a glance what storefront the order is being picked for.
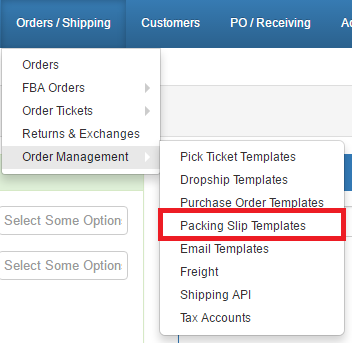
Pick Ticket and Packing Slip Templates:
Pick Tickets are a one-page pdf document that can be printed for an Order that is in "In Stock" status. Pick Tickets usually display basic order information and are used in the warehouse to pick the correct items for the order. Pick tickets can also be used as packing slips, or you have the option of creating a separate template for packing slips. "Print Pick Ticket" is a standard order step in SalesWarp, whereas printing a packing slip would be an extra step.
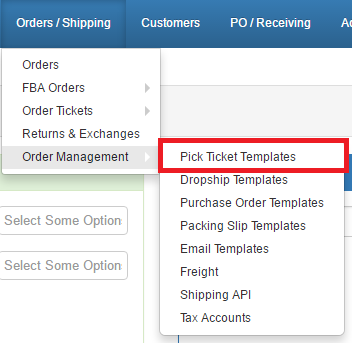
To edit or create pick ticket templates, open the Orders/Shipping menu, choose Order Management, and Pick Ticket Templates. Edit the default template or create a new one. The template Name is used only in the list of templates inside SalesWarp. Here we have created an Amazon Pick/Pack ticket for Amazon orders, using the default pick ticket as the basis. By clicking edit at the end of that row we can modify what information appears on this Amazon pick ticket.
The NAME only appears inside SalesWarp. The TITLE and LOGO will display at the top of the pick ticket, along with the Order Number and Customer Name, which are displayed by default. Upload an image for your logo. Choose to display the Header and/or Footer. Use the WYSIWYG editor to enter content or select "Source" to enter custom HTML. The Header and Footer can be used to add standard information, such as additional branding or a returns and exchanges policy.
.png)
The Information, Product field, All Page Settings sections show which data elements you can include or exclude from displaying on this template. Most of the data elements on the Pick Ticket are also on the Pack Slip. The pick ticket does have some notes fields, that include internal notes that depending upon your business use, might not be appropriate for a customer to see. The Pack Slip template has the ability to add some additional price related fields. But again, some customers opt to use the pick ticket form for the packslip, as well. The Display Barcode option will add a barcode of the Order Number to the pick ticket, that can be scanned for faster pick-pack-ship processes.
.png)
In the Assign to store section, you can choose which stores are assigned this template. Our scenario was that Amazon required a unique form, so this form is assigned only to Amazon. All of your other stores could use the same form, or each have a unique form, or somewhere in between.
Be sure to click submit to save your template(s) once you've modified or created them.
Dropship orders are created when an ordered item has no stock on hand, and the product has been specified as Normally Dropshipped with Reorder Enabled and a Reorder Supplier specified. Dropship orders can be sent as a PDF file (printed or emailed) or as a CSV file (emailed). The Dropship Order Template will format the PDF version of the dropship order. The CSV version contains only basic order information such as Order ID, Line Item IDs, Customer Name, Shipping Address, Product Name, SKU, Order Date and Shipping Carrier.
To edit or create dropship order templates, open the Orders/Shipping menu, choose Order Management, and Dropship Templates.

Edit the default template or create a new one. The template Name is used only in the list of templates inside SalesWarp, and the template Title will display at the top of the dropship order.
.png)
Upload an image for your logo. Use the Header and Footer sections to enter customized content to be displayed on every print of this version. Use the WYSIWYG editor to enter content or select "Source" to enter custom HTML. The Dropship Order Number, Order Date, Dropship Order Status, Customer Order Code, and Customer Shipping Address will be displayed by default.

Under the Information section, choose to display certain pieces of information about the vendor. Under the Product Field section, choose to display certain pieces of information about the ordered products.

Assign the dropship order template to a supplier here, or by editing the store. Click Submit to save the template.
Purchase orders can be created manually or automatically based on the Reorder Threshold specified at the product level. Purchase Orders can be sent as a .pdf file (printed or emailed) or exported into a .csv file. The Purchase Order Template will format the .pdf file.
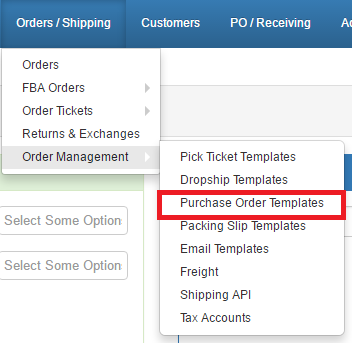
To edit or create purchase order templates, open the Orders/Shipping menu, choose Order Management, and Purchase Order Templates. Edit the default template or create a new one. The template Name is used only in the list of templates inside SalesWarp, and the template Title will display at the top of the purchase order.
Upload an image for your logo. Use the Header and Footer sections to enter standard, customized content. Use the WYSIWYG editor to enter content or select "Source" to enter custom HTML. The PO Number, Order Date, PO Status and Next Step will be displayed by default.

Under the Information section, choose to display certain pieces of information about the PO and vendor. Under the Product Field section, choose to display certain pieces of information about the ordered products.

Assign the purchase order template to a supplier here, or by editing the store. Click Submit to save the template.
To create a custom email template, begin by navigating to Orders/Shipping -> Order Management -> Email Templates.
Once there, click on ![]() in the upper left hand corner of the page.
in the upper left hand corner of the page.
Now, you can begin customizing your new email template. Start by entering a name for your template in the name box.
Next, choose a relevant type for your template. There are 5 types of emails that are automatically used by SalesWarp:
1.Order - Sends to the customer when a new order is saved inside SalesWarp. Triggered by clicking the Submit button on the Create Order page. Order email templates are assigned per store.
2.Shipping - Sends to the customer when all ordered items are updated as "shipped." This can be triggered by manually completing the Shipping step or when SalesWarp receives tracking information from your shipping software. Shipping email templates are assigned per store.
3.Purchase Orders - Sends to the supplier, with the purchase order attached as a .pdf or .csv file. Triggered by sending the PO to the supplier. Purchase Order email templates are assigned per supplier.
4.Dropship - Sends to the supplier, with the dropship order attached as a .pdf or .csv file. Triggered by sending the dropship order to the supplier, and can be send individually or in bulk. Dropship email templates are assigned per supplier.
5.RMA - Sends to the customer when an RMA (Return Merchandise Authorization) is saved. Triggered by clicking the Save button on the Create RMA page. RMA email templates are assigned per store.
6.Customer - can be used to create common emails sent to customers, such as an out-of-stock notice about an ordered item, or a request for a new shipping address if an address is invalid. These emails can be sent from the Orders table or the Customers table, and can be modified at the time of sending.
.png)
Using the subject option drop down menu, you can select a variable the will show up in the subject text box below this field (such as customer name, order number, etc.). In the subject box, the options you chose with the subject option menu will show here {looking_something_like.this} you can type in text will be a static feature in the subject line where ever you put it.
.png)
In the templates body area you can enter in static text in the body area using the WYSIWYG editor. To enter put variables into the body of your template, use the drop down menu called body option and select the variable you want in your templates body. Format your email template how ever you would like!
.png)
Finally, at the bottom of the page you can choose what stores you would like this email template to be used for. If you would like your template to be used for all of your stores, click the "select all" box.
You can test the template you just made by entering your email address into the "Send a Test" box at the bottom of the page. This will send you an email of the template you just made.
Be sure to click save when you're done!
If you have any questions or require further assistance, please feel free to contact us at support@saleswarp.zendesk.com